


Since most people scarcely even know this boss isn't a Sandstorm target I figured I'd throw together a handy little guide detailing how to kill him.
Information!
1. You don't need a templar to kill this.
2. He has an enrage timer, do not attempt without a solid set of dps.
3. Sometimes the floor doesn't light up the way it is supposed to, have someone who can see the effect direct the group away from it!
4. His spawn timer is less than 24 hours.
5. He spawns on both channels.
6. Suggested alliance size: 10-12
Guide:
First off, this is the legendary-grade Jotun boss that hangs out in the northernmost hallway of Debarim's Studio in Sarpan (that air PvP zone nobody uses). Getting there is easy as there are no mobs in the hallway leading up to his room.
It is important to note that upon starting this boss encounter the door to the room will close, potentially locking opponents out or separating your group should the boss fight be started accidentally. Also note that you can kisk in this room and should do so to avoid potential wipes.
Phase 1:
Debarim starts off by mixing a long range AoE, which will likely hit the whole group, and a single knockdown skill on the tank. Neither of which does much damage and should cause no stress for the healers or the tank. The AoE hits for roughly 2-3k and the knockdown skill is roughly 3-4k. This phase is rather simple and shouldn't take much time.
Phase 2:
Once Debarim hits 75% health he will cast rage, stunning the group, and begin to use Terraspin. This skill hits everyone in the designated area for roughly 7-8k and should be avoided if at all possible. Thankfully, avoiding this skill is simple as there is always text preceding the skill that will say "The center ground is shaking, move." and it can be either left, right, or center. Simply move out of the lit zone (or follow someone who can actually see it) and you will avoid the damage completely. This phase is made even more simple by the fact that Debarim enters a stunned state for 15 seconds after each Terraspin and is completely vunerable. Rinse and repeat until 50%.
Phase 3:
Debarim will now revert back to his AoEs in addition to using Terraspin every so often, thus making this phase a combination of the previous two. Assuming your group has gotten this far, you should have no trouble dealing with this phase.
Phase 4:
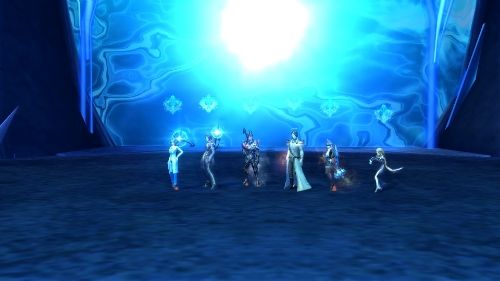
At this point in the fight (25%) text will show on the screen something like "The cave is collapsing! Find safe ground to attack Debarim!" you'll do just that. This time you'll see bright blue circles appear on the floor, do not stand in them as you will take periodic damage. Find a safe spot to continue dpsing Debarim and keep pulling him down. Everyone, including the healers, will need to be moving around to make sure they aren't in any of the circles.
Congratulations on a successful world boss encounter!
Debarim drops eternal level 58(?) earrings and several other blues.
Hope you found this guide helpful!
-Fest
Information!
1. You don't need a templar to kill this.
2. He has an enrage timer, do not attempt without a solid set of dps.
3. Sometimes the floor doesn't light up the way it is supposed to, have someone who can see the effect direct the group away from it!
4. His spawn timer is less than 24 hours.
5. He spawns on both channels.
6. Suggested alliance size: 10-12
Guide:
First off, this is the legendary-grade Jotun boss that hangs out in the northernmost hallway of Debarim's Studio in Sarpan (that air PvP zone nobody uses). Getting there is easy as there are no mobs in the hallway leading up to his room.
It is important to note that upon starting this boss encounter the door to the room will close, potentially locking opponents out or separating your group should the boss fight be started accidentally. Also note that you can kisk in this room and should do so to avoid potential wipes.
Phase 1:
Debarim starts off by mixing a long range AoE, which will likely hit the whole group, and a single knockdown skill on the tank. Neither of which does much damage and should cause no stress for the healers or the tank. The AoE hits for roughly 2-3k and the knockdown skill is roughly 3-4k. This phase is rather simple and shouldn't take much time.
Phase 2:
Once Debarim hits 75% health he will cast rage, stunning the group, and begin to use Terraspin. This skill hits everyone in the designated area for roughly 7-8k and should be avoided if at all possible. Thankfully, avoiding this skill is simple as there is always text preceding the skill that will say "The center ground is shaking, move." and it can be either left, right, or center. Simply move out of the lit zone (or follow someone who can actually see it) and you will avoid the damage completely. This phase is made even more simple by the fact that Debarim enters a stunned state for 15 seconds after each Terraspin and is completely vunerable. Rinse and repeat until 50%.
Phase 3:
Debarim will now revert back to his AoEs in addition to using Terraspin every so often, thus making this phase a combination of the previous two. Assuming your group has gotten this far, you should have no trouble dealing with this phase.
Phase 4:
At this point in the fight (25%) text will show on the screen something like "The cave is collapsing! Find safe ground to attack Debarim!" you'll do just that. This time you'll see bright blue circles appear on the floor, do not stand in them as you will take periodic damage. Find a safe spot to continue dpsing Debarim and keep pulling him down. Everyone, including the healers, will need to be moving around to make sure they aren't in any of the circles.
Congratulations on a successful world boss encounter!
Debarim drops eternal level 58(?) earrings and several other blues.
Hope you found this guide helpful!
-Fest


